 |
| Coffin Ombre Nails |
Most 7 Coffin Ombre Nails Design
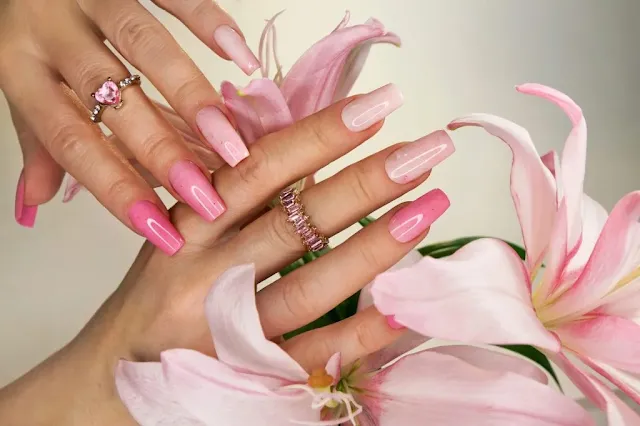
Coffin ombre nails are a type of nail design where the nails are painted with two or more colors that blend into each other gradually from the base to the tips of the nails. The ombre effect creates a matte gradient of color, giving the nails a stylish and chic look. The term "coffin" refers to the shape of the nail, which resembles a coffin or tapered square. Coffin ombre nails are a popular trend in nail art and can be achieved using a variety of techniques such as sponge blending, brush blending, or pre-blended polish.
Classic Ombre Nails:
Usually women are fond of making such nails. Classic ombre nails have a gradient effect that blends two colors together, usually from light to dark or vice versa. This style can be achieved by using a sponge or brush to apply the colors or by applying nail polish with a special ombre brush. The colors used can be any combination, but popular choices include pink, blue, purple, and nude. The classic ombre nail design is versatile and can be dressed up or down, making it a popular choice for women for everyday wear or special occasions.
Reverse Ombre Nails
 |
| Reverse ombre nails |
Reverse ombre nails, also known as “negative space ombre nails,” are a modern and creative twist on traditional ombre nails. Instead of gradually blending colors from dark to light or vice versa, reverse ombre nails have a fade that starts with a lighter shade near the cuticle and gradually transitions to a darker shade near the tip of the nail.
To create reverse ombre nails,
you will need:
1: Two nail polishes in contrasting colors
2: A makeup sponge
3: Tape or liquid latex
4: A base coat and a top coat
5: Here's how to do it:
Start by applying a base coat to your nails to protect them and help the polish adhere better.Once the base coat is dry, apply a light coat of a lighter shade of polish to your nails. Let it dry completely.
Next, take a makeup sponge and apply a strip of your darker shade of polish to one end of the sponge.Dab the sponge on a piece of paper or palette to remove any excess polish.Place a piece of tape or liquid latex around the edge of your nail, leaving only the area you want to paint.Press the sponge onto the exposed part of your nail, starting near the cuticle and working your way toward the tip. Use a light tapping motion to blend the colors together.
If necessary, repeat steps 3-6 until you achieve the desired ombre effect.Once you're happy with the ombre effect, remove the tape or liquid latex.Apply a top coat to seal in the polish and add shine.Let your nails dry completely before doing anything else with your hands.And there you have it! Reverse ombre nails that are sure to turn heads.
Glitter Ombre Nails:
 |
| Glitter ombre nails |
Glitter ombre is a popular and trendy nail manicure style that involves mixing two or more shades of glitter nail polish to create a gradient effect on the nails. Here's how you can achieve this look at home:
Materials you will need:
1: Two or more shades of glitter nail polish
2: Clean the base coat.
3: Clear top coat.
4: Makeup sponge
5: Nail polish remover
6: Cotton yarn
7:Small bowl of hot watern
8: Instructions
Start by prepping your nails. Remove any old nail polish, file and shape your nails, and push back your cuticles.
Apply a clear base coat on your nails and let it dry completely. Choose your first shade of glitter nail polish and apply a thin coat to your nails. Let it dry for a few minutes.Add a small amount of your second shade of glitter nail polish to a small bowl of warm water. You can also use a piece of foil or a paper plate to hold the polish.Dip the makeup sponge in water and then press it against the side of the bowl to remove excess water.
Apply the sponge gently to your nails, starting at the tips and working your way towards the cuticles. You want to create a gradient effect, so don't apply too much of another color at once.
Repeat this process with any additional shades of glitter nail polish you want to use, making sure to blend each layer into the previous one.Once you are satisfied with the ombre effect, allow your nails to dry completely.Use a cotton ball dipped in nail polish remover to clean off any polish that gets on your skin.
Apply a clear top coat to seal in the shine and add a glossy finish to your nails.And that's it! With a little patience and practice, you can achieve stunning glittery ombre nails at home.
Matte Ombre Nails:
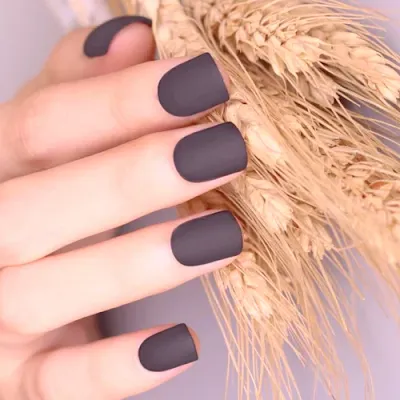 |
| Matte ombre nails |
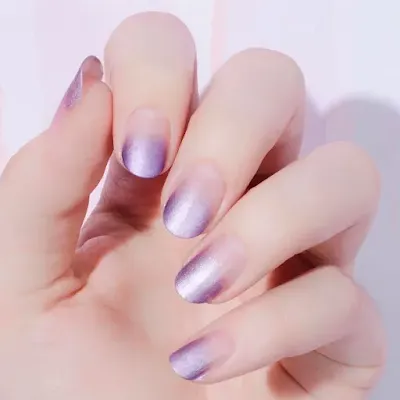
Matte ombre nails are a popular nail art trend where the color gradually fades from one shade to another. The matte finish adds a unique touch to the classic ombre design, giving the nails a chic and modern look.
To get matte ombre nails,
you'll need:
1:Two or more nail polish colors of your choice
2:A makeup sponge
3: Base coat and top coat
4:Matte top coat
5: Here's how to do matte ombre nails:
Start by applying a base coat to your nails to protect them and help the nail polish last longer.
Apply your chosen base color on your nails and wait for it to dry completely.
Take your first ombre color and apply it to a makeup sponge.Dab the sponge onto the edge of your nails, starting at the base of the nail and working your way toward the tip. Keep pressing until the color gradually fades.
Repeat this process with your second ombre color, starting from the center of the nail and working your way towards the tip. Make sure to blend the colors where they meet.
Let the polish dry and then apply a layer of matte top coat to finish the look.
Repeat the process on all the nails.
With these simple steps, you can create a stunning matte ombre nail look that's perfect for any occasion. Experiment with different colors and gradients to find your favorite combination.
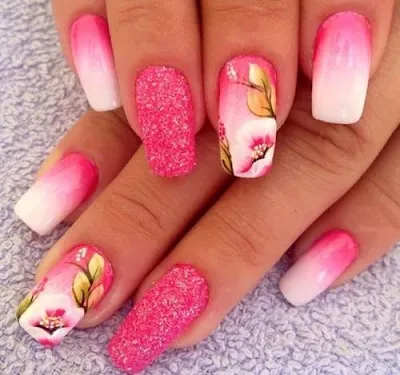
Floral Ombre Nails:
Floral ombre nails are a cute and feminine twist on the classic ombre nail trend. This design incorporates floral patterns and soft color gradients to create a stunning and romantic look.
To get floral ombre nails,
you'll need:
1: Two or more nail polish colors of your choice
2: A makeup sponge
3: Small paint brush or dotting tool
4: A white nail polish
5: Top coat
Here are the steps to make floral ombre nails:
Start by applying a base coat to your nails to protect them and help the nail polish last longer.
Apply a white base coat on your nails and wait for it to dry completely.
Choose two or more colors you want to use for your ombre. We recommend using pastel shades to create a soft and delicate look.
Paint each of your chosen colors onto the makeup sponge in a horizontal gradient, starting with the lightest color and moving downwards.
Dab the sponge onto the edge of your nails, starting at the base of the nail and working your way toward the tip. Keep pressing until the color gradually fades.
Repeat this process with your other colors until you achieve the desired ombre effect.
Once the ombre is dry, use a small paintbrush or dotting tool to paint floral patterns on your nails. You can use a contrasting color or shade that complements your ombre gradient.
Allow the floral designs to dry and then apply a top coat to protect your nails and give them a glossy finish.
With these simple steps, you can create a beautiful floral ombre nail design that's perfect for spring, weddings, or any occasion where you want to add romance and elegance to your nails.
Gradient ombre nails
Gradient ombre nails are a classic and timeless nail art trend that never goes out of style. This design involves mixing two or more colors to create a smooth transition from one shade to another, resulting in a beautiful gradient effect.
To get gradient ombre nails,
you will need:
1: Two or more nail polish colors of your choice
2: A makeup sponge
3: Base coat and top coat
Here are the steps for creating gradient ombre nails:Start by applying a base coat to your nails to protect them and help the nail polish last longer.
Choose two or more colors you want to use for your ombre. It is best to choose colors that are similar in tone and complement each other well.
Paint your lightest color onto a makeup sponge and apply it to the edge of your nails, starting at the base of the nail and working your way towards the tip. Keep pressing until the color gradually fades.
Repeat this process with your second color, starting from the center of the nail and working your way toward the tip. Make sure to blend the colors where they meet.If you are using more than two colors, repeat the process with your additional colors until you achieve the desired gradient effect.
Once the ombre is dry, apply a top coat to protect your nails and give them a glossy finish.
With these simple steps, you can create a beautiful gradient ombre nail design that's perfect for any occasion. Experiment with different colors and gradients to find your favorite combination.
French Ombre Nails:
French ombre nails are a classic and elegant variation of the traditional French manicure. This design incorporates a subtle gradient effect, in which a natural-looking base color fades into a white or lighter colored tip.
To get French ombre nails,
you'll need:
1: Nude or light pink nail polish
2: White or light colored nail polish
3: A makeup sponge
4: Base coat and top coat
5: French manicure guides or tape
6: Here are the steps to do French ombre nails:
Start by applying a base coat to your nails to protect them and help the nail polish last longer.
Apply your chosen base color (nude or light pink) to your nails and wait for it to dry completely.
Cut the makeup sponge into a small rectangle and paint one corner of the sponge with white or light colored nail polish.
Press the sponge onto the edge of your nails, starting at the tip and working your way toward the base of the nail. Keep pressing until the color gradually fades and blends into the base color.
Repeat the process on all the nails.
Once the ombre is dry, apply French manicure guides or tape to the tips of your nails, leaving a small space between the guide and the edge of the nail.
Apply white or light colored nail polish on the tips of your nails and wait for it to dry.Remove the French manicure guides or tape.
Apply a top coat to protect your nails and give them a shiny finish.With these simple steps, you can create a beautiful and classic French ombre nail design that's perfect for any occasion. Experiment with different primary colors and gradient intensities to find your favorite combination.

.webp)


0 Comments